
Welcome to our comprehensive guide on installing roof vents, a task that not only enhances your home’s energy efficiency but also contributes to its overall health. With a few simple steps, you can upgrade your roof ventilation system, ensuring a well-ventilated and moisture-free environment. Read on as we break down the process into easy-to-follow steps, empowering you to take on this DIY project and reap the benefits.
Why Install a Roof Vent?
Proper roof ventilation is key to preserving your home’s structural integrity and optimizing energy usage. By allowing air to circulate, roof vents prevent moisture buildup, safeguard against potential issues like leaks and mold, and extend the lifespan of your roof. Plus, it’s a cost-effective project that you can tackle with confidence.
Step 1: Mark the Vent Spots
Start by accessing your attic and marking the spots where the vents will be installed. Use a nail to create a reference point, ensuring precise placement and avoiding interference with rafters or wires. Plan the layout if installing multiple vents, typically positioning them near the ridges of the roof.
Step 2: Remove the Affected Shingles
Carefully remove the shingles that will be impacted by the vent installation. Take your time to avoid damaging surrounding shingles, and retain the removed shingles for reattachment later in the process.
Step 3: Drill a Hole Through the Roof
Drill a hole around the marked nail, taking precautions not to hit any rafters. The type of vent you choose will dictate the shape of the hole. If opting for a static vent, a box-shaped hole is usually appropriate. Safety is paramount during this step, so don protective eye gear to shield yourself from sawdust.
Step 4: Reinstall the Lower Shingles
Position the roof vent in place without installing it to mark where to cut the old shingles. Ensure that the lower shingles go under the vent, allowing water to slide off. Cut the shingles to fit the vent size, seal old nail holes with roofing tar or caulk, and then reinstall and secure the shingles.
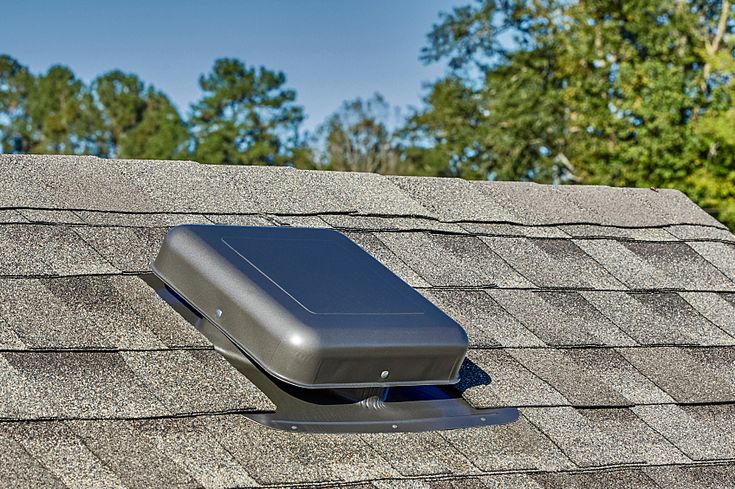
Step 5: Install the Roof Vent
Apply roofing tar or caulk around the hole and underneath the vent. Secure the vent in place with nails (4–6 nails are typically sufficient). Caulk around the nails for waterproofing. Reinstall the upper shingles on top of the vent, securing them properly.
Conclusion: A Breath of Fresh Air for Your Home
Congratulations! By following these simple steps, you’ve successfully installed a roof vent, contributing to a well-ventilated and moisture-resistant home Ideal for the Portland weather. This DIY project not only improves your home’s overall health but also adds value and energy efficiency. Enjoy the benefits of a well-ventilated space and potentially lower energy bills, all achieved with your own hands. Happy roofing!